<?xml version="1.0" encoding="UTF-8"?>
<?xml-stylesheet href="transform-to-html_v0.4.28.xsl" type="text/xsl"?>
<html xmlns="http://www.w3.org/1999/xhtml">
<head>
          <title>Defsystem UG (haftungsbeschränkt)</title>
          <link rel="icon" href="/favicon.ico" type="image/x-icon"/>
          <link rel="shortcut icon" href="/favicon.ico" type="image/x-icon"/>
          <meta property="og:title" content="Defsystem UG (haftungsbeschränkt)"/>
          <meta property="og:description" content="Defining connected systems. We design sensor systems and IoT devices. We realize proofs of concept, prototypes and minimum viable products (MVPs)."/>
          <meta property="og:type" content="website"/>
          <meta property="og:url" content="https://www.defsystem.net"/>
          <meta property="og:image" content="http://www.defsystem.net/images/defsystem-logo-sq.jpg"/>
          <meta property="og:image:secure_url" content="https://www.defsystem.net/images/defsystem-logo-sq.jpg"/>
          <!-- more headers for html rendering -->


	</head>
<body>
  <article class="post featured">
    <header class="major">
      <span class="date">April 7, 2022</span>
      <h2>Instructions for Wi‑Fi provisioning<br/> via Bluetooth BLE</h2>
      <p>
        This is the documentation for the Wi‑Fi provisioning method
        that we have implemented for the Defsystems atoms mentioned
        in the previous post
        <a href="defsystem-atom-IoT-devices.xml">Defsystem atoms ready</a>.
      </p>
    </header>
    <a class="image main"><img src="images/WifiProv/ESP-BLE-Prov-03_20220327-120723_only-cam.jpg" alt=""/></a>

<h2>LED states and configuration</h2>
<p>
  <ol>
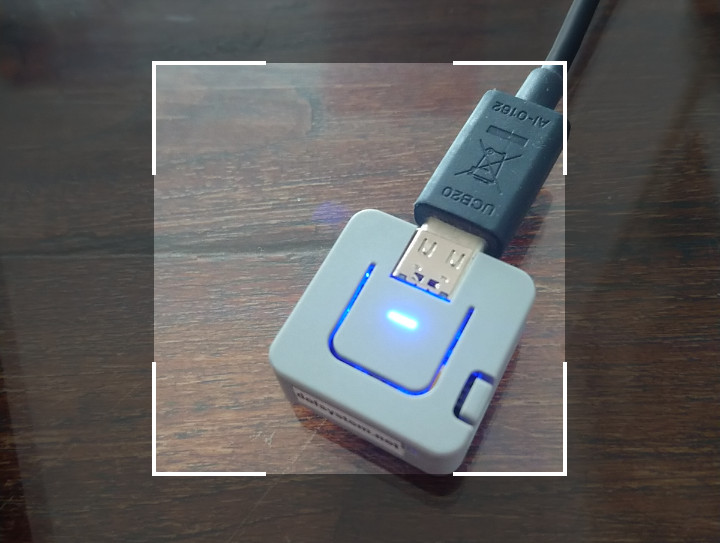
<li>When you plug the device in (that is, you connect via its USB-C connector to an
USB power source) and the LED shines BLUE it means that the device
waits for provisioning. This is the default inital state of the Defsystem devices.
Use the provisioning app as described below in the section "device configuration".</li>

<li>When you plug the device in and the LED shines GREEN it means that the device
is provisioned and it tries to connect to the Wi‑Fi. If it stops being GREEN,
that means it successfully connected.</li>

<li>But if it continues to shine GREEN, it means the device does not
find the network or cannot connect to it. You might want to do the
provisioning all over again, which you can do by this the following
procedure:
</li>

<li> When you hold the big butten (with the hole for the LED) while
you reset the device (that is, you either (re-)connect it to the power
source or you press the little reset button on the side), the LED will
switch to YELLOW. That means it deleted the known Wi‑Fi
credentials. If you release the button, the device will reboot and the
LED should be BLUE. Continue with step 1.</li>
  </ol>
</p>

<h2>device configuration – short version</h2>

<p>
<a href="https://en.wikipedia.org/wiki/Wikipedia:Too_long;_didn%27t_read"><b>TL;DR</b></a>
You need to use the app "ESP BLE Provisioning" by Espressif
to use the device. You can find it in the App Stores of Google and Apple.
Use it to tell the device how it connect to
a Wi‑Fi network. It does not work without Wi‑Fi.
<br/>
<!--The example provisioning apps are in the App Stores of Google and Apple,
source code and more programs also for Windows, Linux, MacOSX can be
found on
<a href="https://docs.espressif.com/projects/esp-idf/en/latest/esp32/api-reference/provisioning/provisioning.html#provisioning-tools">Espressif's documentation pages, under provisioning-tools</a>.
<br/>
-->
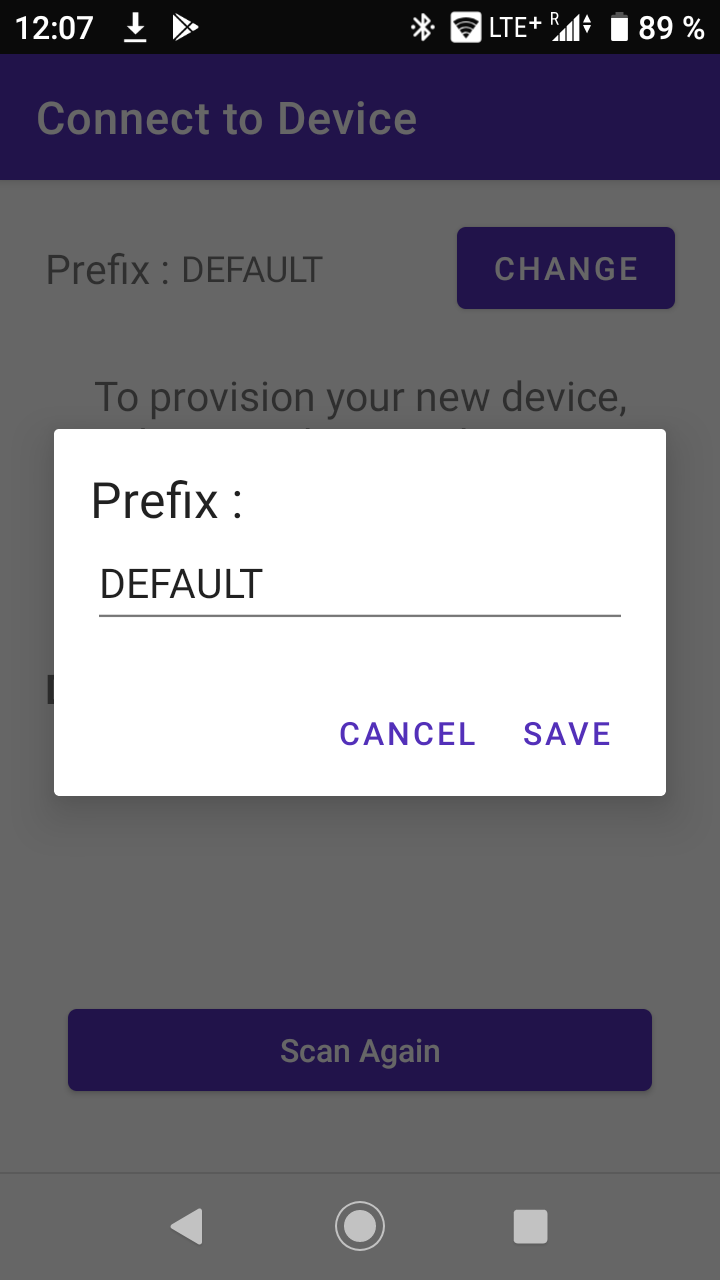
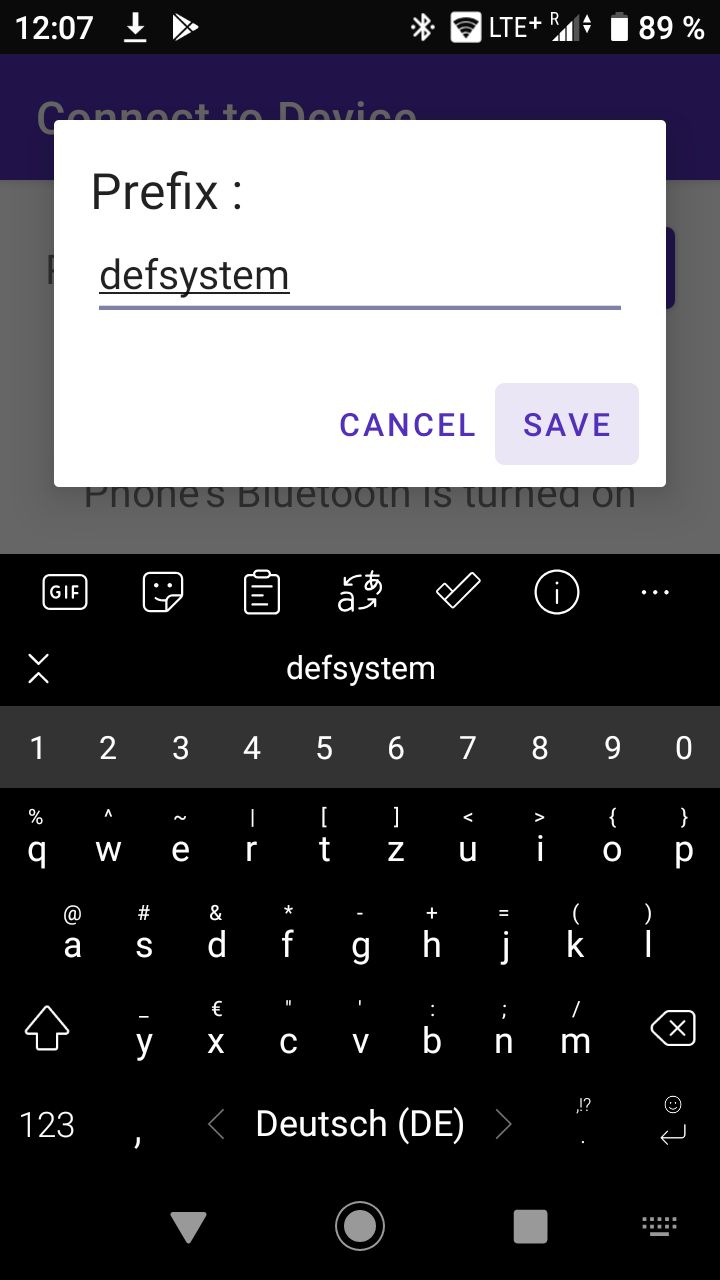
The provisioning is quite straight forward when using the apps. You can just try on your own. Only one important thing: In the step "Connect to System", you need to change the "Prefix" to "defsystem" to be able to find the device. Click on the button "CHANGE" to do so. 
</p>


<h2>device configuration – long version</h2>
<!--<h3>Long explanation</h3>-->

<p>
The uLisp systems on the M5Stack Atom Lite ESP32 run a version of
m5stack-ulisp-esp that has Wi‑Fi provisioning activated. We have
implemented it to use Espressif's Unified Provisioning using Bluetooth
Low Energy (BLE) as the transport. Unified Provisioning is an
extensible mechanism to transfer Wi‑Fi credentials and also other
custom configuration. Unified Provisioning is documented on
<a href="https://docs.espressif.com/projects/esp-idf/en/latest/esp32/api-reference/provisioning/provisioning.html">Espressif's provisioning documentation page</a>.
</p>
<p>
That is, the device wants to run with Wi‑Fi and when it does not know
any, it waits for you to configure it. When you plug them in and the LED
shines BLUE it means that the device waits for provisioning. With this
provisioning you configure the device and transfer Wi‑Fi crendentials
to it via Bluetooth BLE from another device, a smartphone or a computer.
</p>
<p>
Espressif offeres example applications with code for Android, iOS and
even also a python implementations that runs on Linux, MacOS, and
Window.

The example applications for BLE Provisioning are even available in
the app stores (Apple App Store and Google Play Store), <!-- all also to be
found on <a
href="https://docs.espressif.com/projects/esp-idf/en/latest/esp32/api-reference/provisioning/provisioning.html#provisioning-tools">Espressif's
documentation pages, under provisioning-tools</a>. -->
<!--The example provisioning apps are in the App Stores of Google and
Apple, -->
source code and more programs also for Windows, Linux, MacOSX
can be found on <a href="https://docs.espressif.com/projects/esp-idf/en/latest/esp32/api-reference/provisioning/provisioning.html#provisioning-tools">Espressif's
documentation pages, under provisioning-tools</a>.
<br/>
</p>

<h3>Direct links to the provisioning tools</h3>
<p>
  <dl>
    <dt>Android</dt>
    <dd>
      <a href="https://play.google.com/store/apps/details?id=com.espressif.provble">BLE Provisioning app in Google's Play Store</a>
    </dd>

    <dt>iOS</dt>
    <dd>
    <a href="https://apps.apple.com/in/app/esp-ble-provisioning/id1473590141">BLE Provisioning app in Apple's app store</a>
    </dd>

    <dt>Linux/MacOS/Windows</dt>
    <dd>
      <a href="https://github.com/espressif/esp-idf/tree/c1bcb8756b/tools/esp_prov">esp_prov (a python based command line tool for provisioning)</a>
    </dd>
  </dl>
</p>
<p>
Note: Max has used the Android app "ESP BLE Provisioning" by Espressif
during the <a href="IoT-devices-and-embedded-systems-with-uLisp.xml">demo
at the European Lisp Symposium 2022</a>.
</p>

<h3>Step by step explanation of the "ESP BLE Provisioning"</h3>

<p>
<a href="https://en.wikipedia.org/wiki/Wikipedia:Too_long;_didn%27t_read"><b>TL;DR</b></a>
The provisioning is quite straight forward when using the apps. You can just try without reading this whole section. Only one important thing: In the step "Connect to System", you need to change the "Prefix" to "defsystem" to be able to find the device. Click on the button "CHANGE" to do so.
</p>

<p>
  Here is a complete walkthrough:
</p>

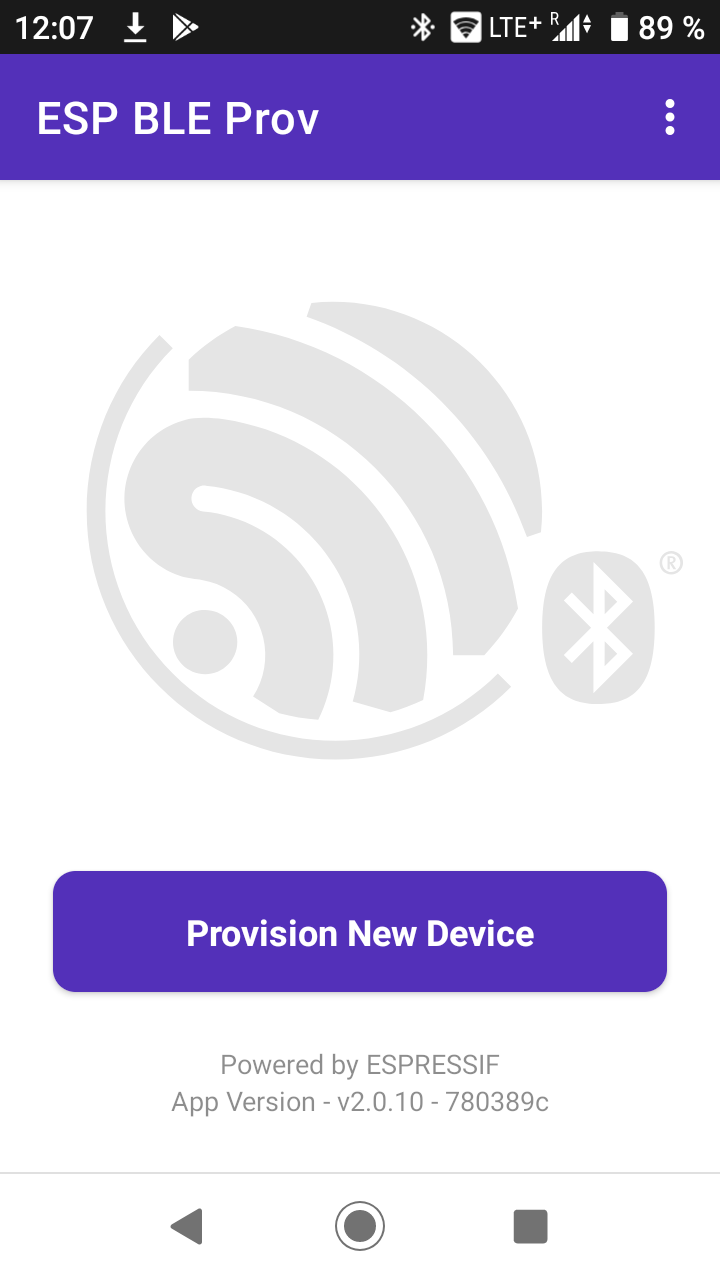
<p class="clear"><span class="image left"><img src="images/WifiProv/ESP-BLE-Prov-01_20220327-120708.png" alt=""/></span>
1.<br/>
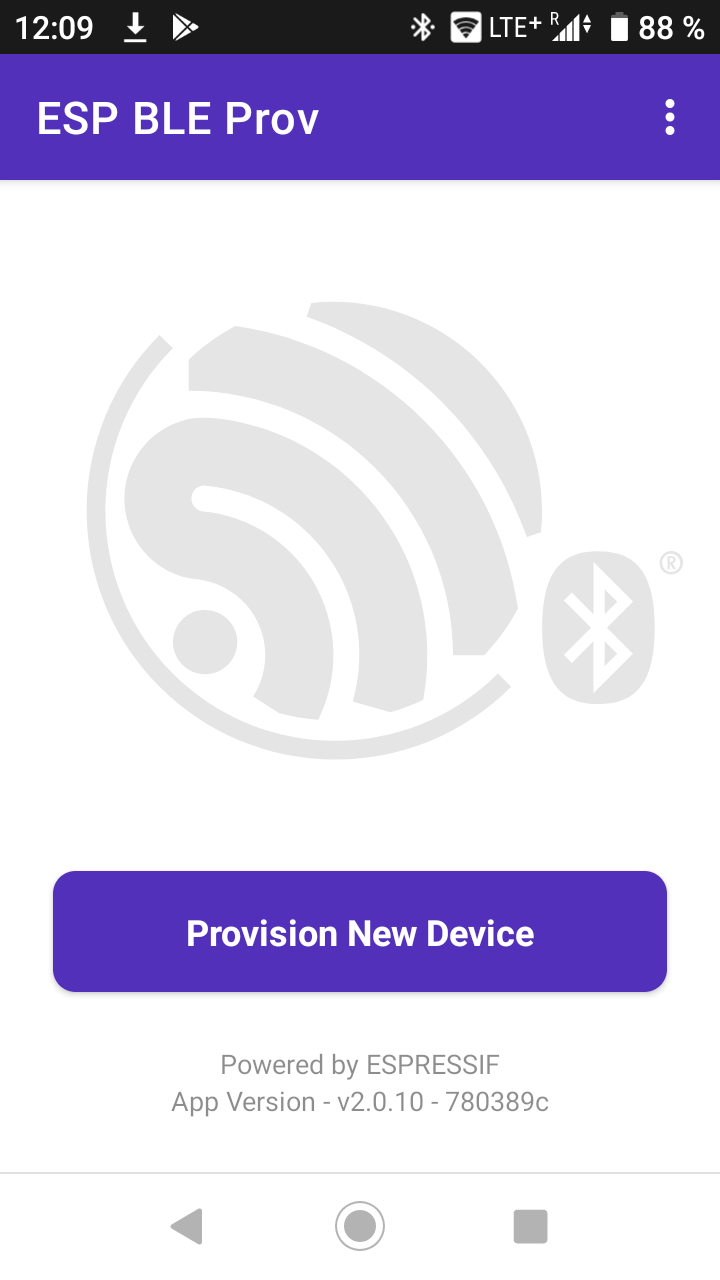
This is the initial screen of the provisioning app. Just click on the button "Provision New Device".
</p>

<p class="clear"><span class="image left"><img src="images/WifiProv/ESP-BLE-Prov-02_20220327-120713.png" alt=""/></span>
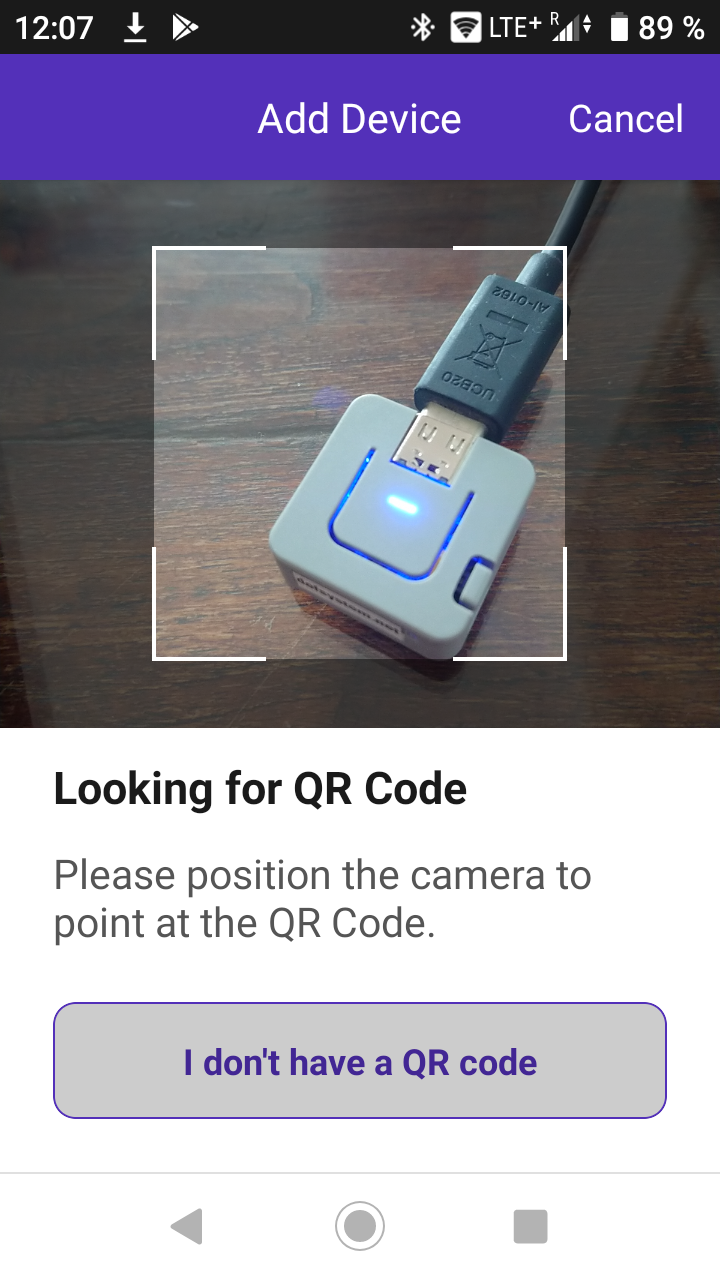
2.<br/>
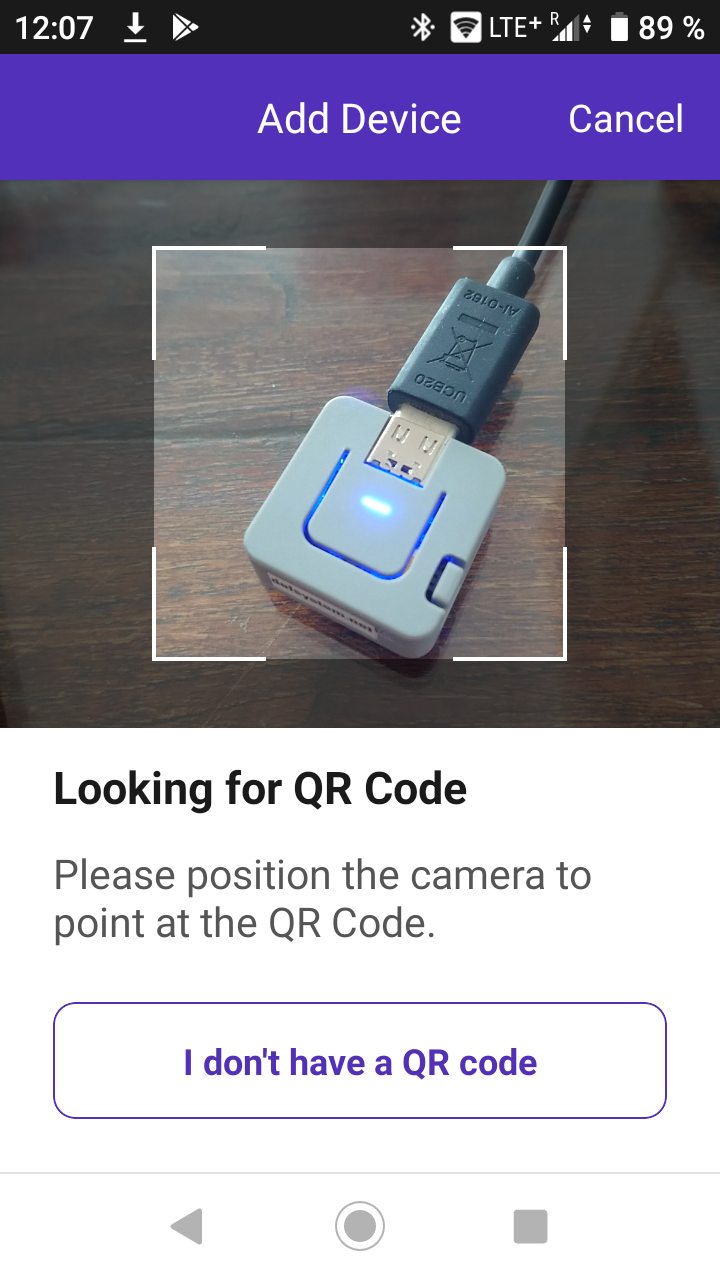
QR codes can be used to make provisioning easier …
</p>

<p class="clear"><span class="image left"><img src="images/WifiProv/ESP-BLE-Prov-03_20220327-120723.png" alt=""/></span>
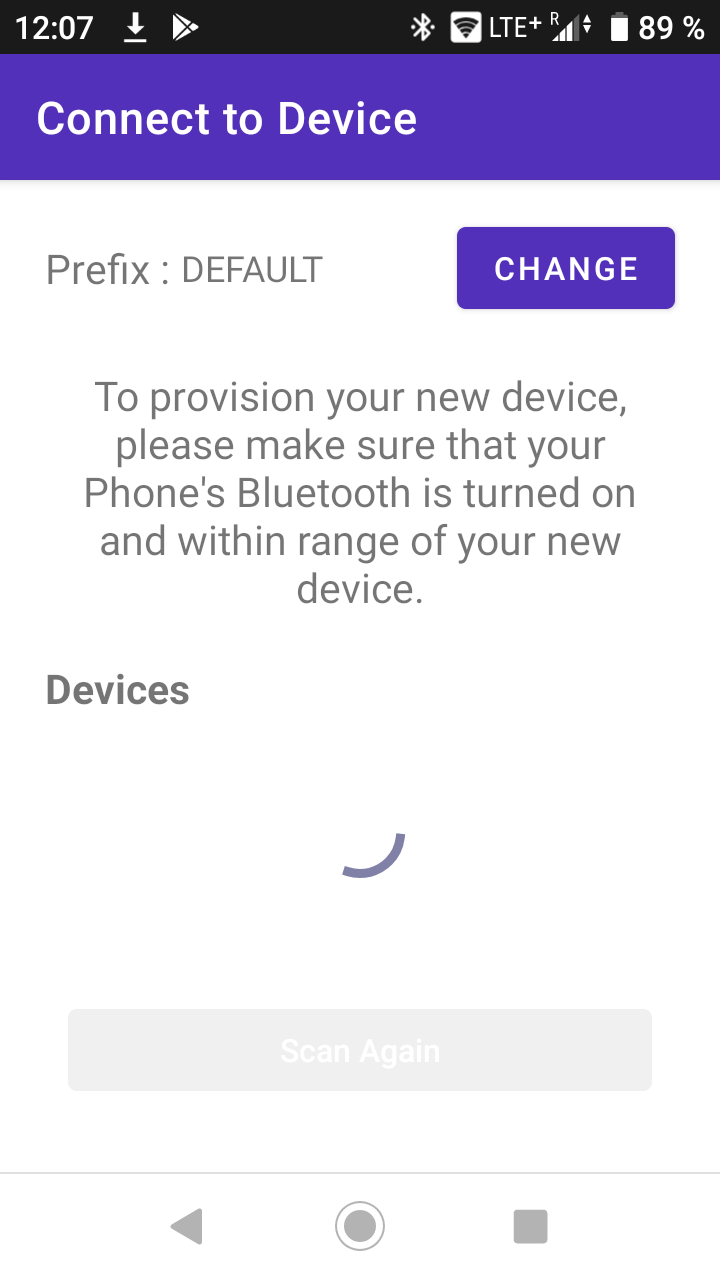
3.<br/>
… but as there is no QR code on the Defsystem device, just click on the button "I don't have a QR code".
</p>

<p class="clear"><span class="image left"><img src="images/WifiProv/ESP-BLE-Prov-04_20220327-120728.png" alt=""/></span>
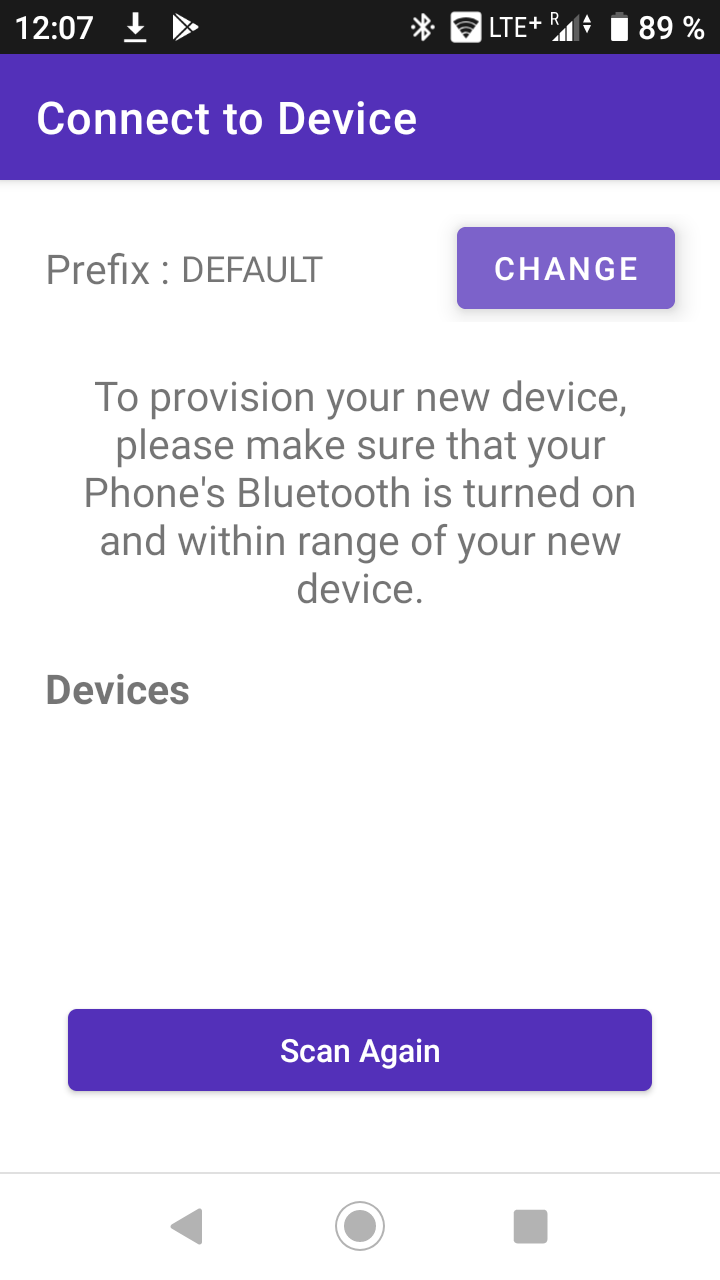
4.<br/>
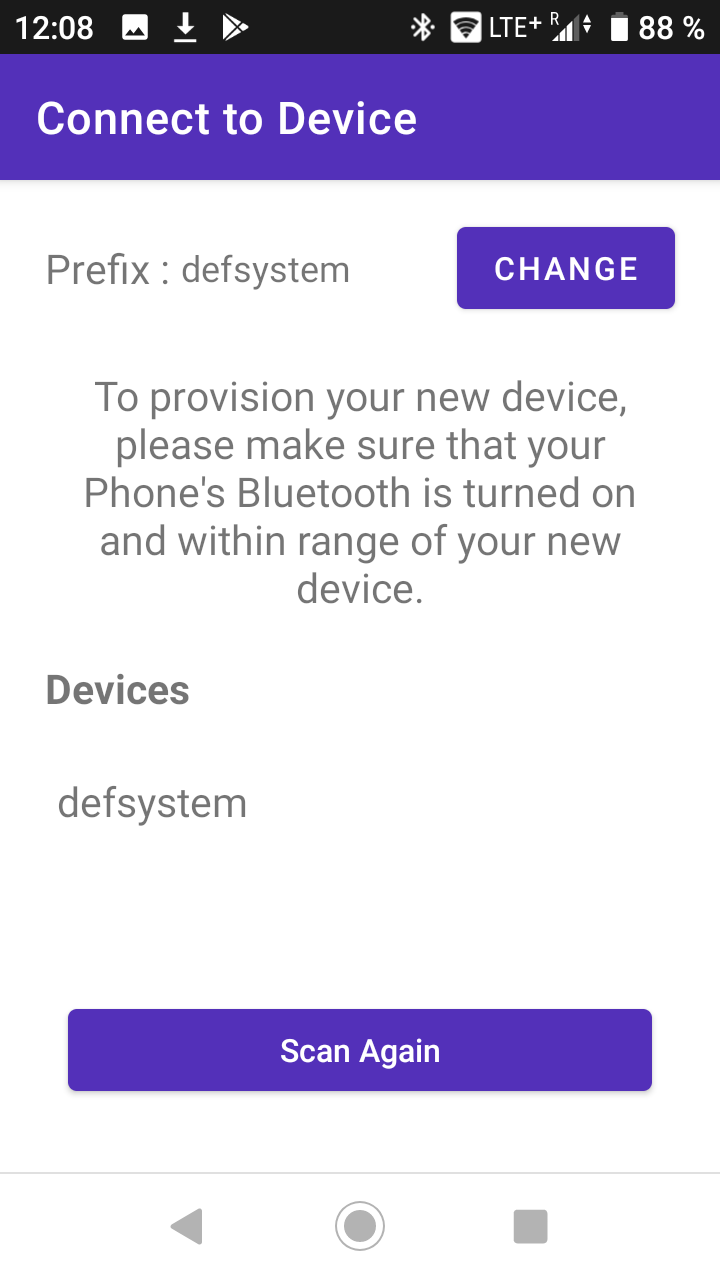
The app looks for devices to provision …
</p>

<p class="clear"><span class="image left"><img src="images/WifiProv/ESP-BLE-Prov-05_20220327-120734.png" alt=""/></span>
5.<br/>
… but as the search prefix is set to "DEFAULT", the app does not find any devices.
So click on the button "CHANGE".</p>

<p class="clear"><span class="image left"><img src="images/WifiProv/ESP-BLE-Prov-06_20220327-120739.png" alt=""/></span>
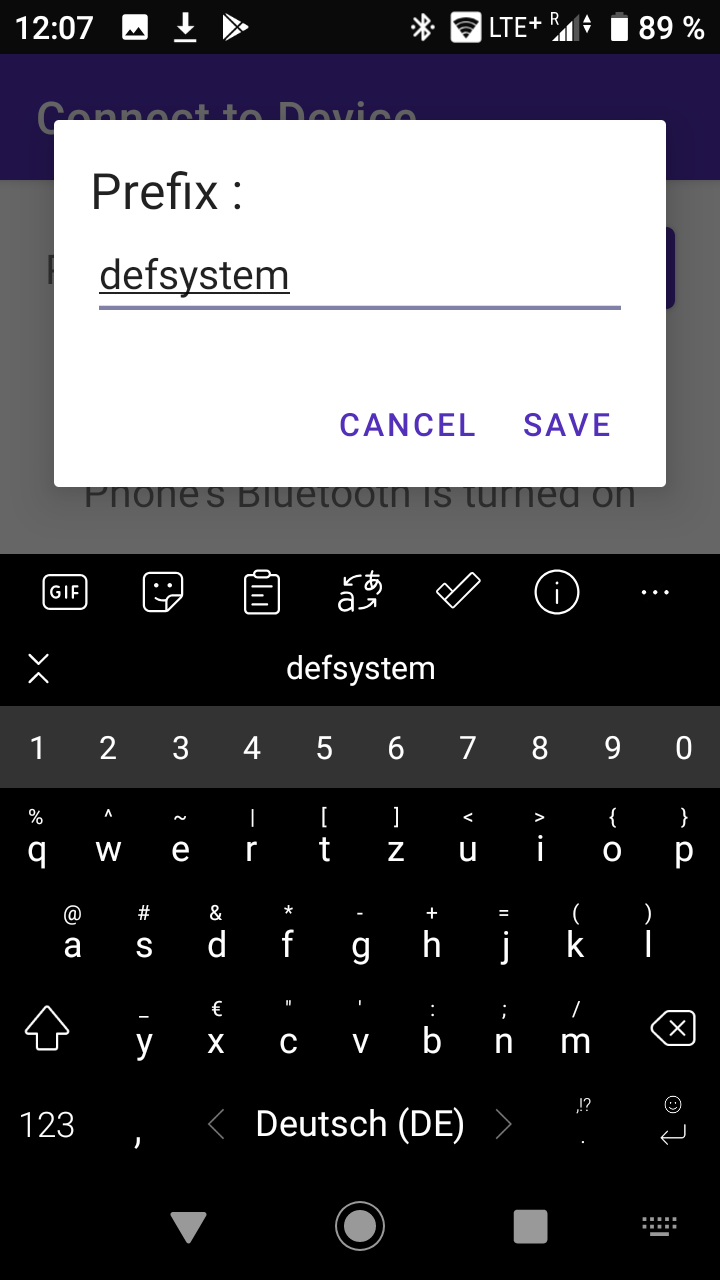
6.<br/>
Select the input field that shows "DEFAULT" …
</p>

<p class="clear"><span class="image left"><img src="images/WifiProv/ESP-BLE-Prov-07_20220327-120749.png" alt=""/></span>
7.<br/>
… and type in "defsystem" instead …
</p>

<p class="clear"><span class="image left"><img src="images/WifiProv/ESP-BLE-Prov-08_20220327-120756.png" alt=""/></span>
8.<br/>
… and click on the button "SAVE".
</p>

<p class="clear"><span class="image left"><img src="images/WifiProv/ESP-BLE-Prov-09_20220327-120832.png" alt=""/></span>
9.<br/>
The application should now list your device with name "defsystem" or "defsystem-xx" where "xx" is the two digit number that you should find on the bottom side of your device.
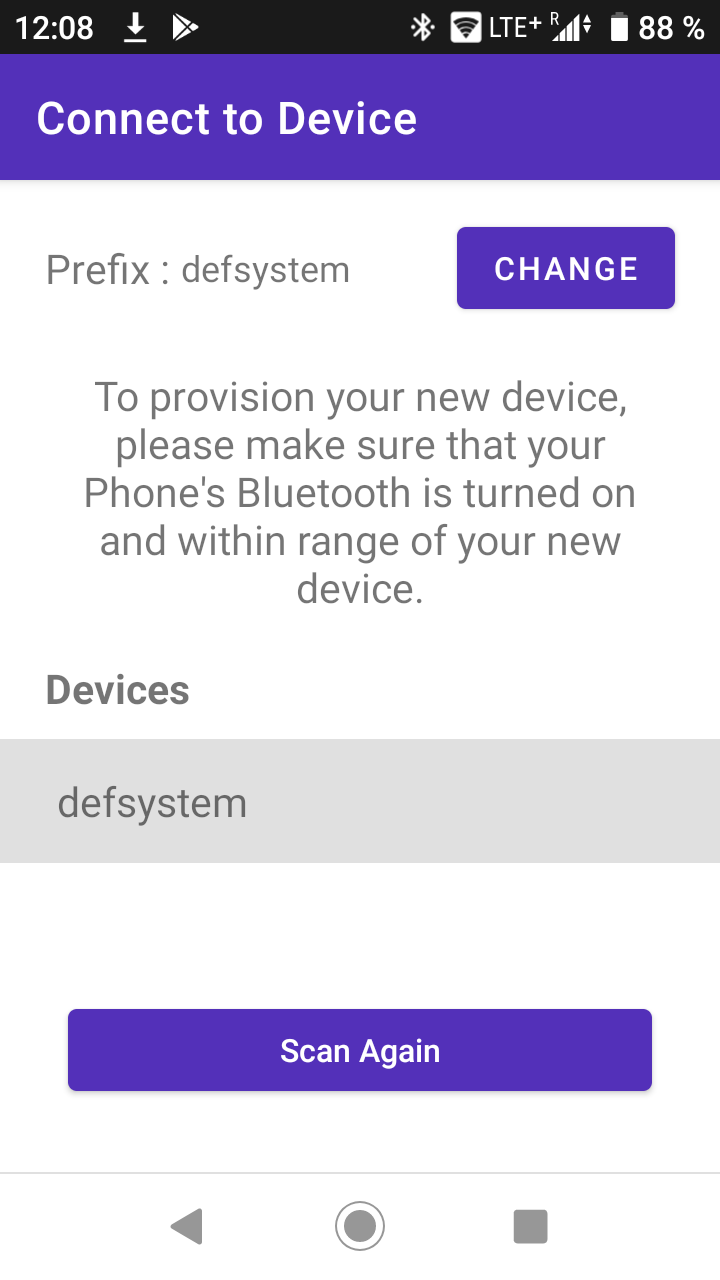
</p>

<p class="clear"><span class="image left"><img src="images/WifiProv/ESP-BLE-Prov-10_20220327-120856.png" alt=""/></span>
10.<br/>
Select your device by clicking on its name.
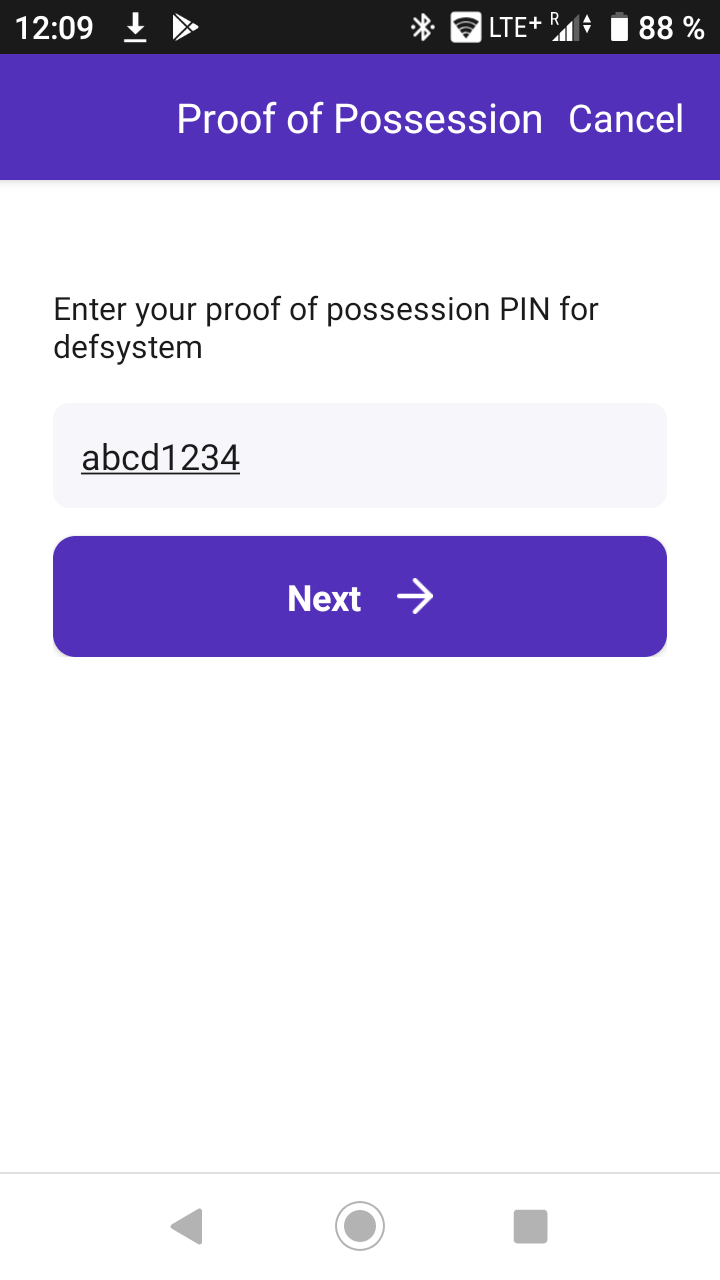
</p>

<p class="clear"><span class="image left"><img src="images/WifiProv/ESP-BLE-Prov-11_20220327-120904.png" alt=""/></span>
11.<br/>
The app asks for a "PIN" code as "Proof of Possession". As we have used the application's default code "abcd1234" you can leave this as it is and just click on the button "Next 🡒".
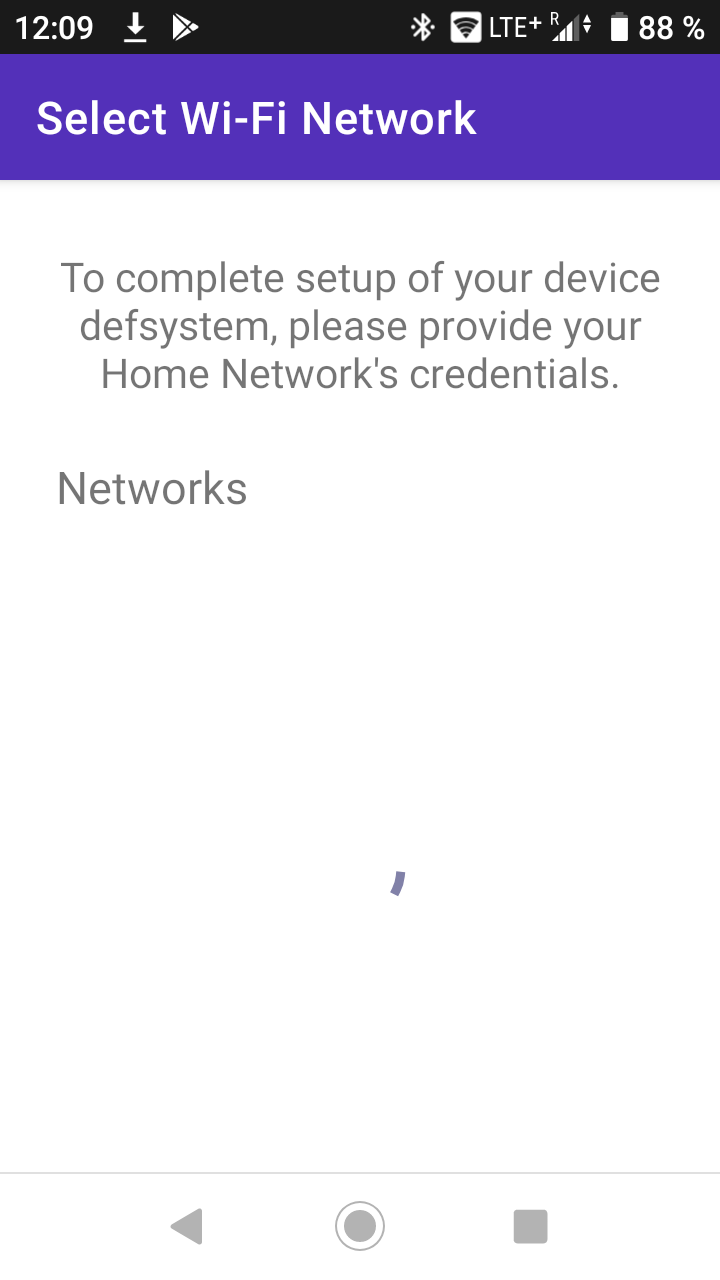
</p>

<p class="clear"><span class="image left"><img src="images/WifiProv/ESP-BLE-Prov-12_20220327-120913.png" alt=""/></span>
12.<br/>
The app should now talk to your device via Bluetooth BLE and make it search for Wi‑Fi networks.
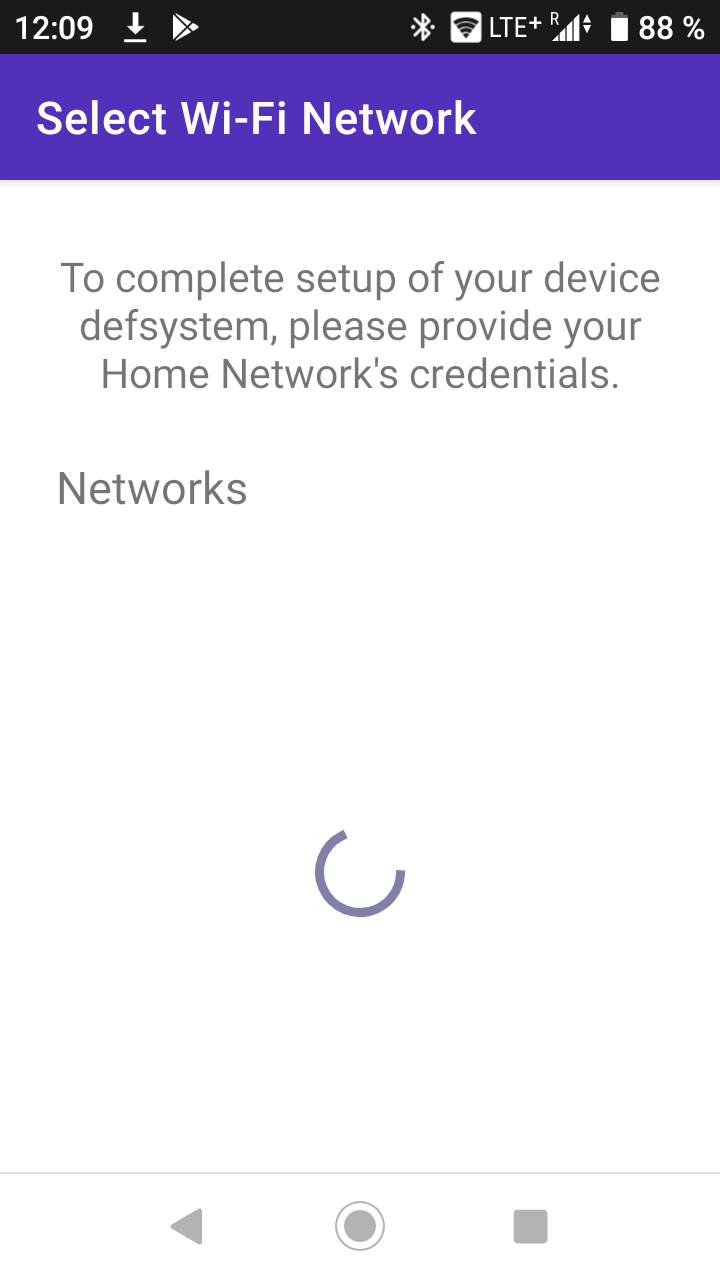
</p>

<p class="clear"><span class="image left"><img src="images/WifiProv/ESP-BLE-Prov-13_20220327-120917.png" alt=""/></span>
13.<br/>
This may take a moment while the app shows a waiting animation.
</p>

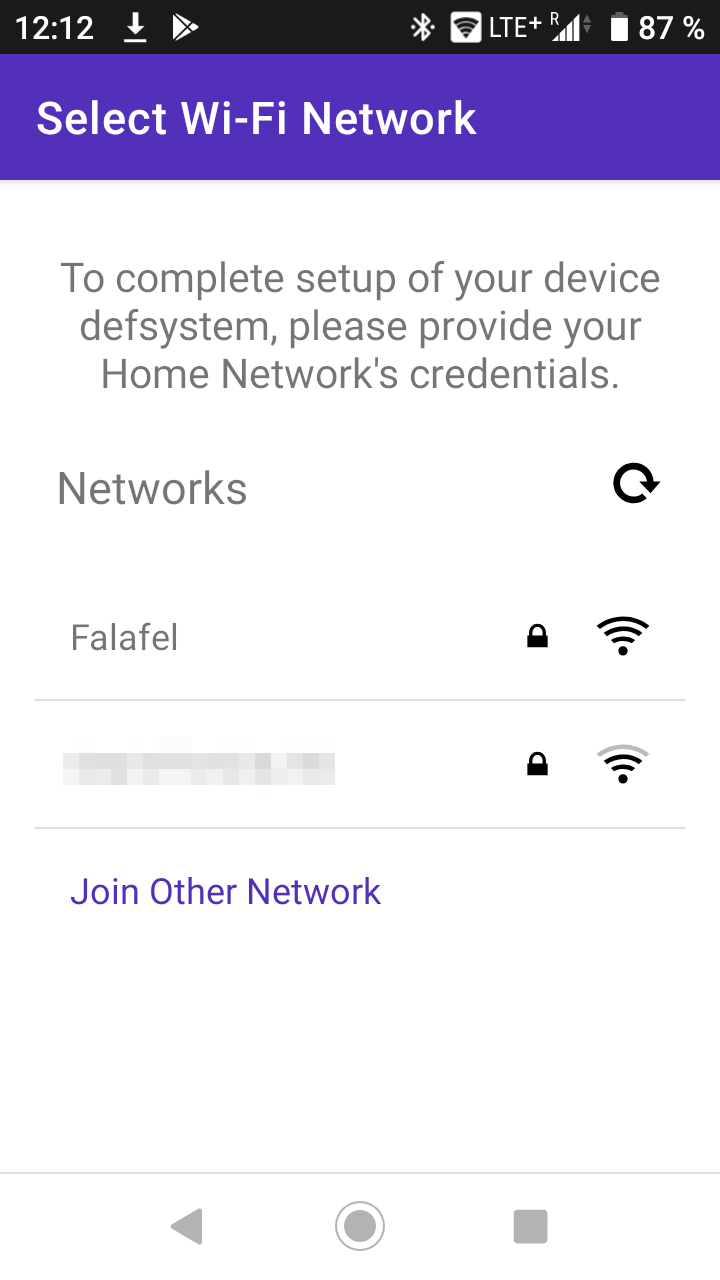
<p class="clear"><span class="image left"><img src="images/WifiProv/ESP-BLE-Prov-14_20220327-121230.png" alt=""/></span>
14.<br/>
Hopefully after a short wait the app presents a list of networks that the Defsystem device has discovered.
</p>

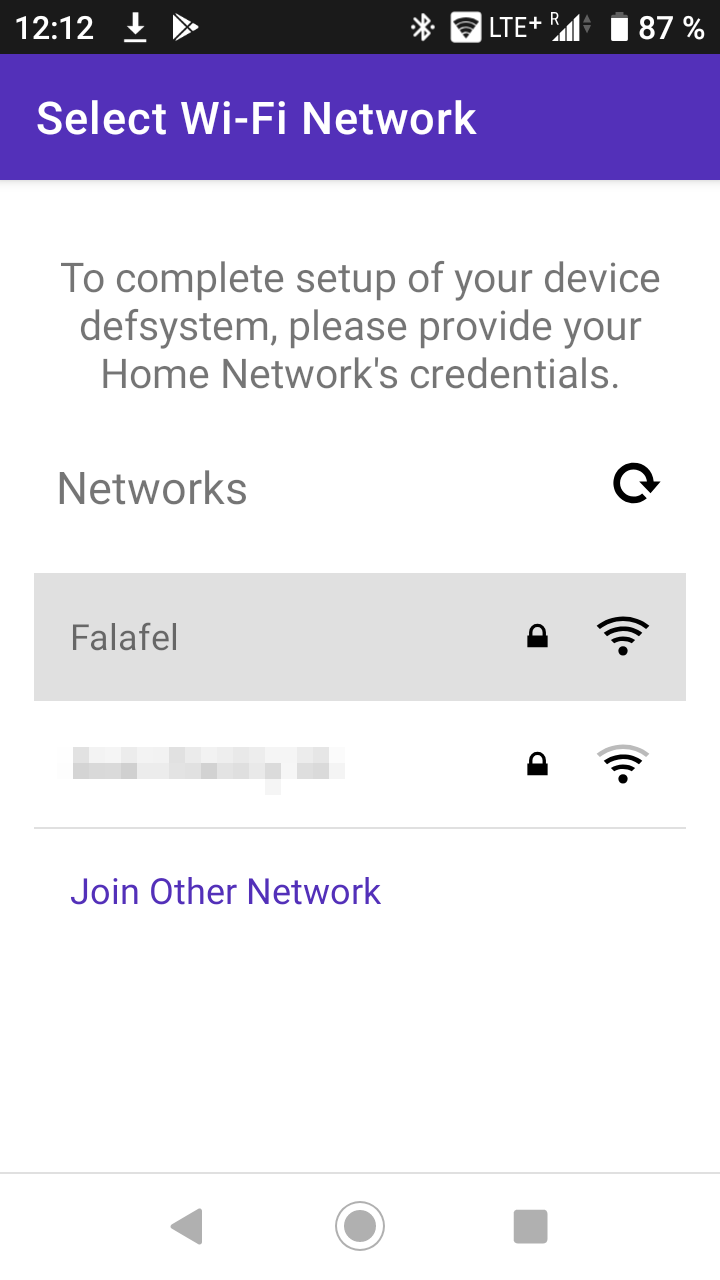
<p class="clear"><span class="image left"><img src="images/WifiProv/ESP-BLE-Prov-15_20220327-121257.png" alt=""/></span>
15.<br/>
In this demonstration we select "Falafel" as our example network.
</p>

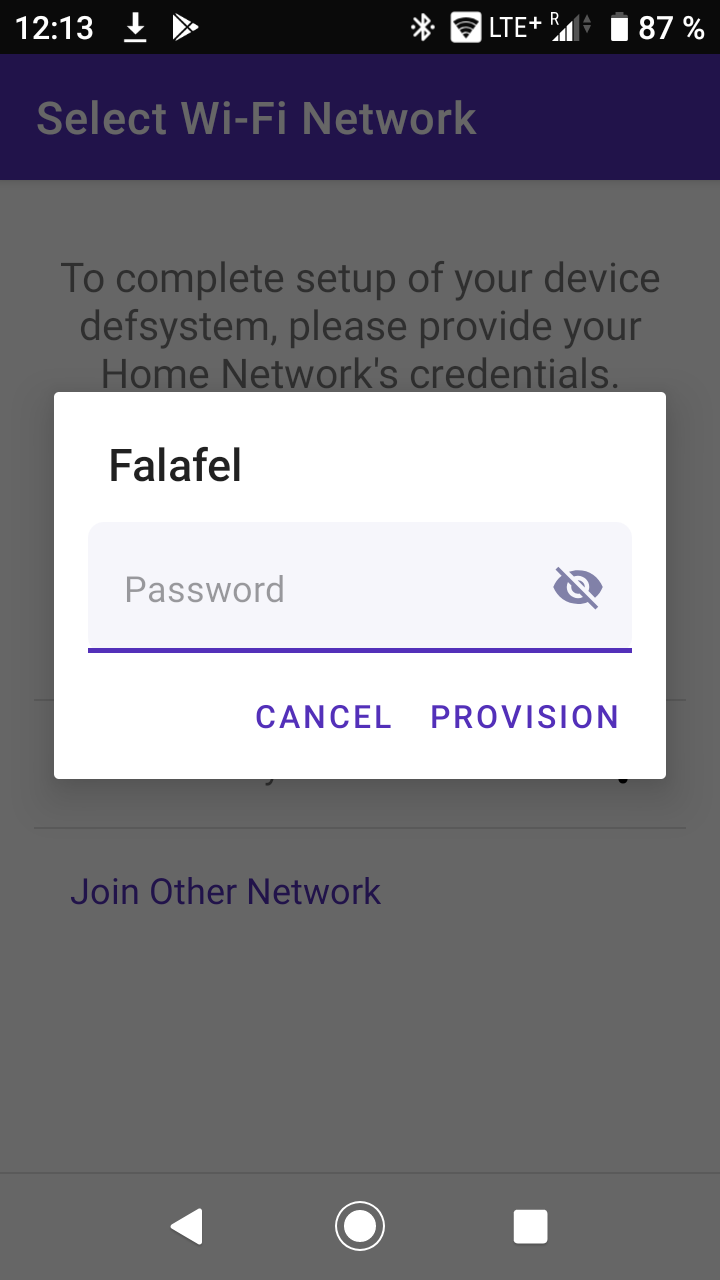
<p class="clear"><span class="image left"><img src="images/WifiProv/ESP-BLE-Prov-16_20220327-121308.png" alt=""/></span>
16.<br/>
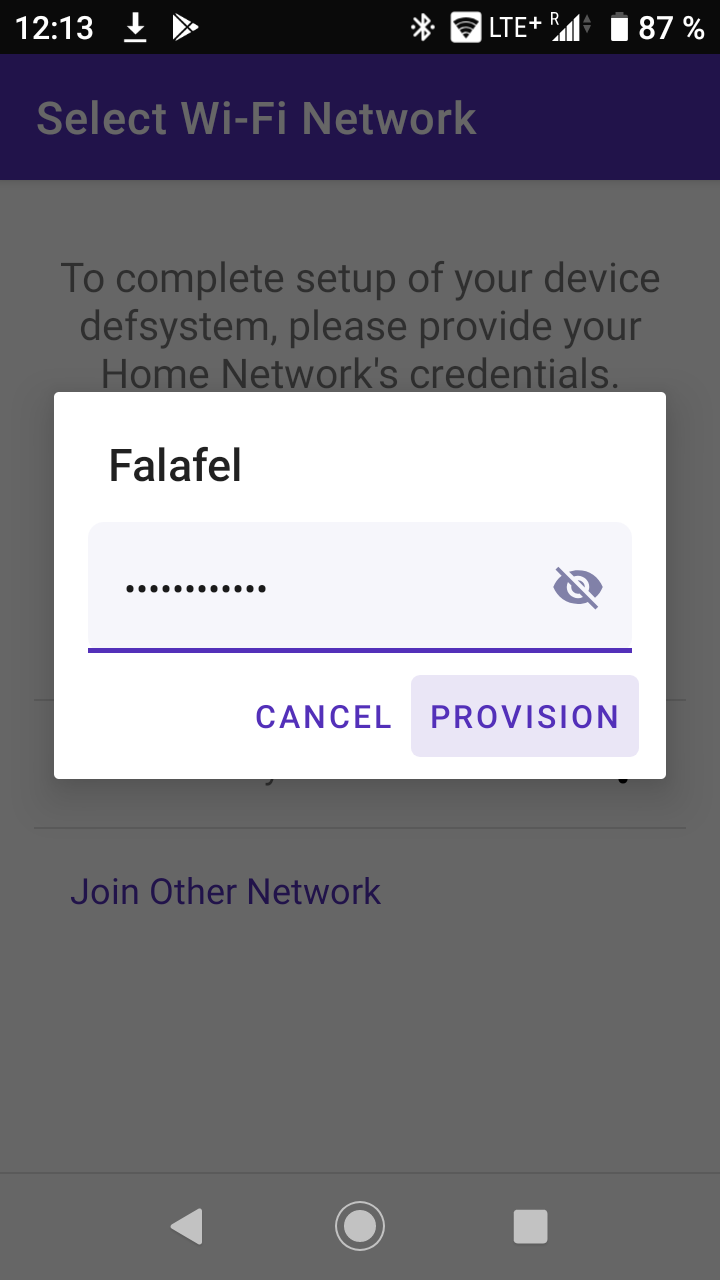
Enter the password for the network …
</p>

<!--
<p class="clear"><span class="image left"><img src="images/WifiProv/ESP-BLE-Prov-17_20220327-121313.png" alt="" /></span>
…
</p>
-->

<p class="clear"><span class="image left"><img src="images/WifiProv/ESP-BLE-Prov-18_20220327-121318.png" alt=""/></span>
17.<br/>
… and click on the button "PROVISION".
</p>

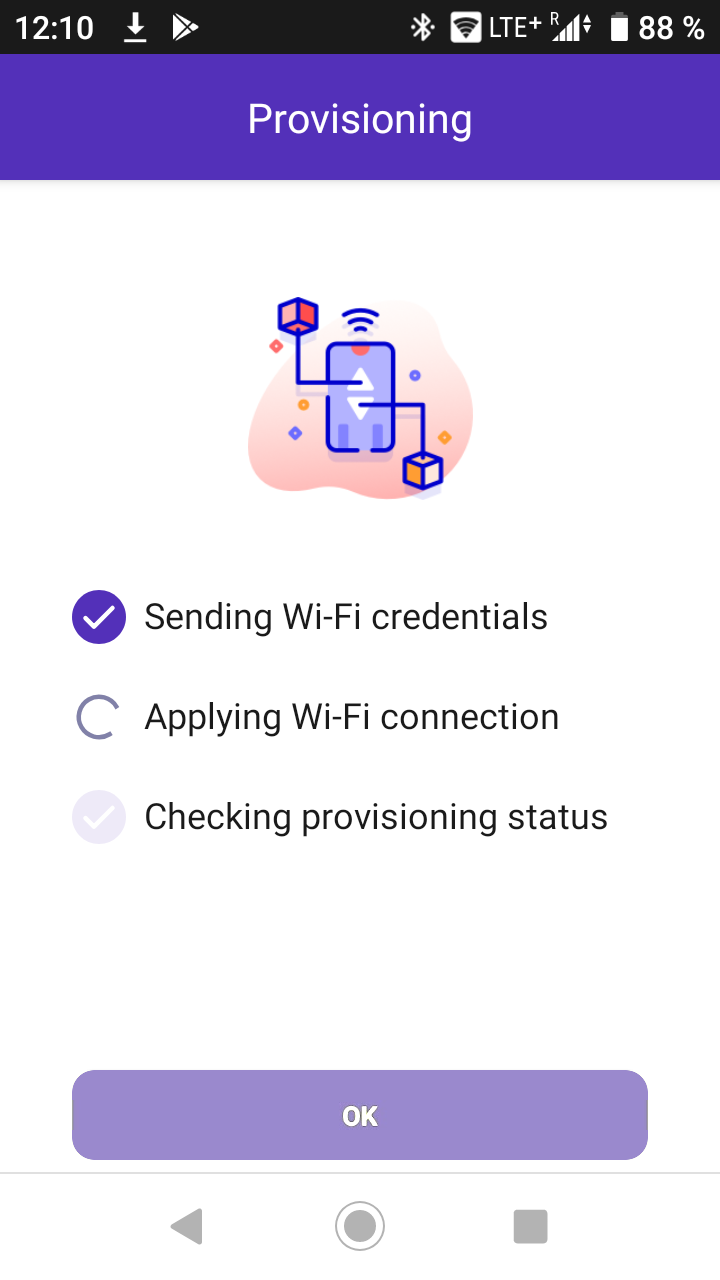
<p class="clear"><span class="image left"><img src="images/WifiProv/ESP-BLE-Prov-19_20220327-121031_button-fixed.png" alt=""/></span>
18.<br/>
The actual provisioning starts. As a first step the app sends the Wi‑Fi credentials …
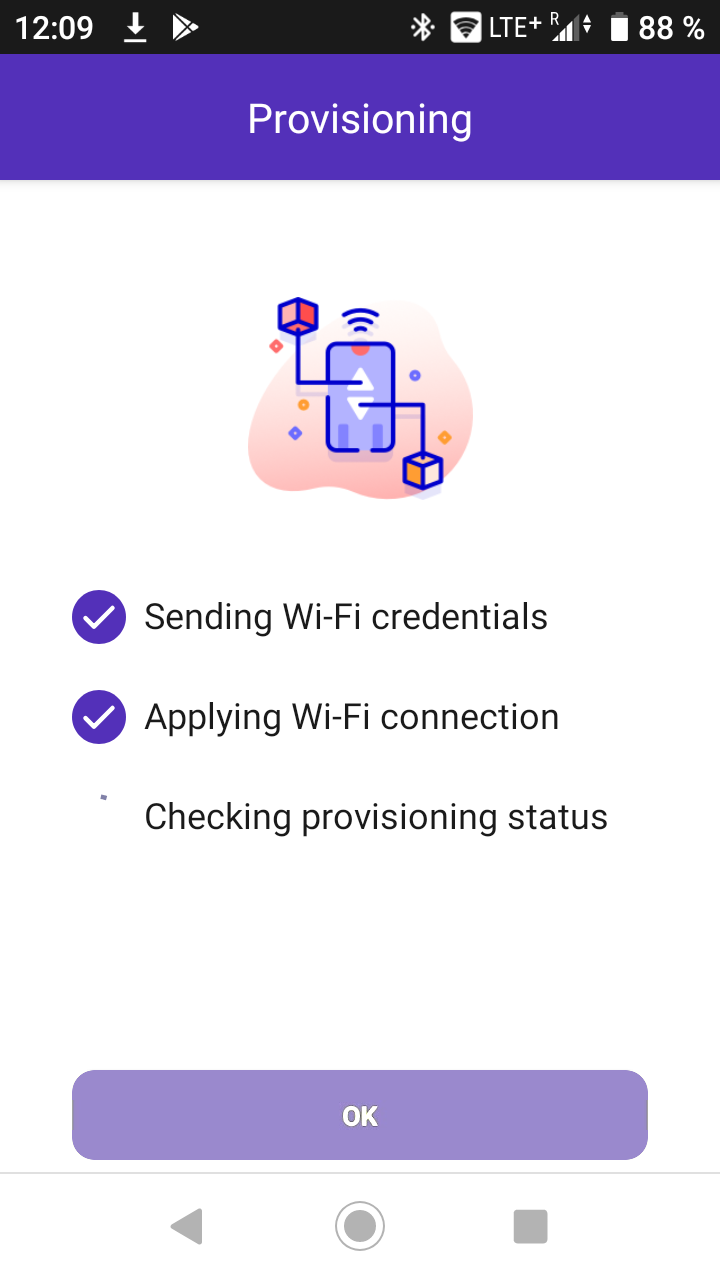
</p>

<p class="clear"><span class="image left"><img src="images/WifiProv/ESP-BLE-Prov-20_20220327-120942_fixed-button.png" alt=""/></span>
19.<br/>
… the second is to wait for the device to actually connect to that network and get a Wi‑Fi connection.
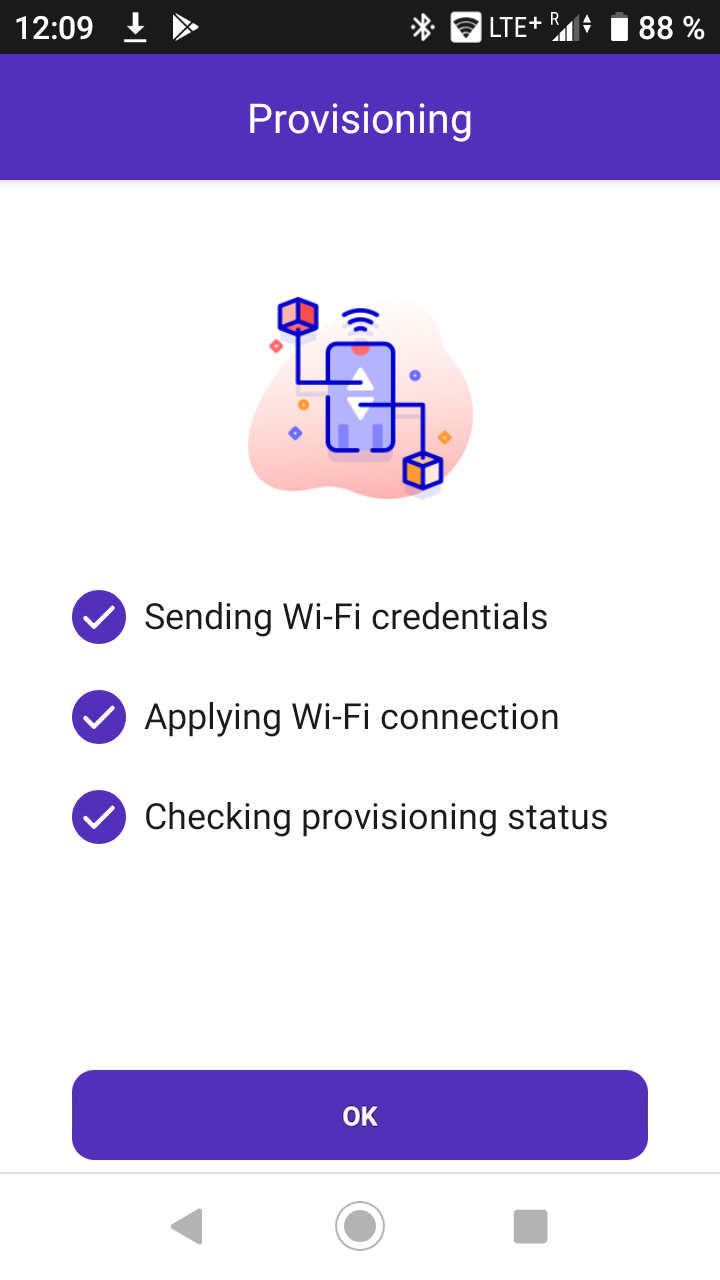
</p>

<p class="clear"><span class="image left"><img src="images/WifiProv/ESP-BLE-Prov-21_20220327-120951_fixed-button.png" alt=""/></span>
20.<br/>
… and the last step is to check for a confirmation by the device that provisioning was successful. </p>
<p>
  The device should reboot and connect to the configured Wi‑Fi
  network. While connecting the device's LED shines GREEN.
</p>
<p>
  When it stops being GREEN, that means, it successfully connected. If
  it continues to shine GREEN, it means it does not find the network or cannot connect.
  In this case you might want to try provisioning again, see section "LED states and configuration" at the top of this page.
</p>
<p>
  If you click on the button "OK" …
</p>

<p class="clear"><span class="image left"><img src="images/WifiProv/ESP-BLE-Prov-22_20220327-120958.png" alt=""/></span>
21.<br/>
… you get back to the starting screen of the provisioning app. You can end the app, or start over provisioning another device.
</p>

    <ul class="actions special">
      <li><a href="index.xml" class="button large">Back to main page</a></li>
    </ul>
  </article>
</body>
</html>